WIP
Typical scenarios related to researcher information
Table of contents
- Create a new member
- Assigning a member to studies
- Update member information
- View Lab Members/See assigned studies
- Mark the availability of a member
- Retire a member
Create a new member
Typical Scenario
Whenever a new member joins the lab, they will have to be provided access to DRDB and added to the system.
How-to
- Navigate to the Personnel Management page
- Select the +
- Add the name, initials, and role
- Add the lab member’s email to the email and Calendar ID boxes
- Select save to add them to the system
Demo
Assigning a member to studies
Typical Scenario
Once lab members are in the system, they need to be added to the specific study they will be working on. Adding a lab member to a specific study adds them to the list of potential experimenters for the study.
How-to
- Navigate to the Study Management page
- Click on the abbreviation for the study on the left side
- Click the person icon
- Select the lab member’s name from the drop-down menu
- Select confirm to add them to the study
Demo
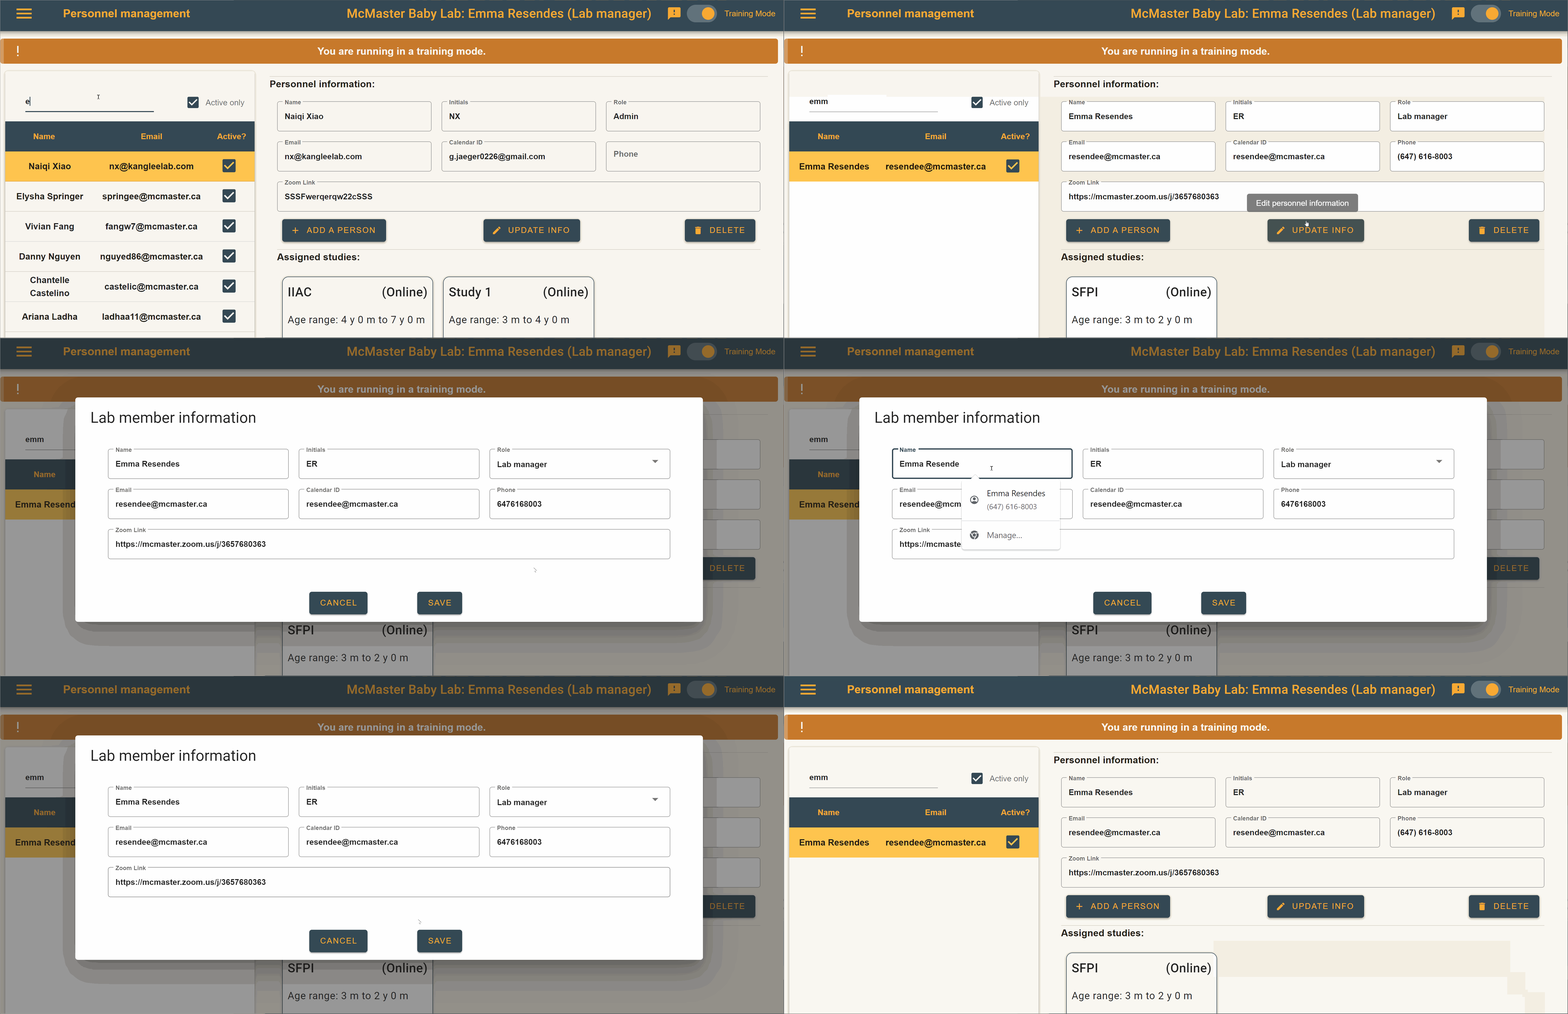
Update member information
Typical Scenario Lab members can only edit their own info. Only Admin and Lab Manager roles can make changes to every lab member’s info.
How-to
- Navigate to the Study Management page
- Select the lab member’s name from the drop-down menu
- Select Update Info and make all desired changes
Demo

View Lab Members/See assigned studies
Typical Scenario DRDB allows lab members to see the studies that each lab member is assigned to. DRDB also allows lab members access to the contact information of other lab members.
How-to
- Navigate to the Personnel Management page
- Search for the lab member using full or partial information
- Select the lab member’s name
- Assigned studies will appear under the member’s name
Demo
Mark the availability of a member
Typical Scenario
Indicating each lab member’s availability in the system is important to ensuring that studies are only booked when an experimenter is available. Lab members must update their lab calendar with the times they are unavailable blocked off and then add their calendar link to the system.
How-to
- Navigate to the Study Management page
- Select the lab member’s name from the drop-down menu
- Select Update Info and add their calendar ID
- Ensure that they have all the times they are unavailable blocked off in their calendar
Retire a member
Typical Scenario
When lab members leave the lab, they need to be switched to inactive members so that they are removed from their assigned studies.
How-to
- Navigate to the Personnel Management page
- Click the box beside the lab members name to change their status to inactive
Demo